
Ductless mini splits for less · 2026 buyer's guides & free sizing helpSize my system →

Quick Answer: Can You Plug a Mini Split Into a 120V Outlet?

Yes - but only if the manufacturer explicitly documents a cord-and-plug connection for that specific model. In 2026, Zone Air is one of the few DIY brands offering 9,000 and 12,000 BTU heat pump mini splits designed for 110–120V operation with a factory-approved optional plug cord kit for the outdoor condenser.

Seeing "115V" or "120V" on a spec sheet alone does not mean you can add your own plug, use an extension cord or connect through a power strip. A proper plug-in install requires a dedicated 15A GFCI outlet on its own circuit, where local codes allow cord-and-plug connections for outdoor HVAC equipment. Mini split compressors must be on a dedicated circuit - no shared loads. Installation must comply with the National Electrical Code (NFPA 70), and local building codes may require hardwiring instead of plugging in. By contrast, typical 230V mini splits must be hardwired with double-pole breakers, often requiring an electrician, a permit and potentially a subpanel upgrade.

The rest of this article walks through:

  • What a plug cord option from the manufacturer can look like
  • How to find the right size of 120V plug-in system for your space
  • Wiring basics and code requirements
  • A high-level DIY install overview

What Is a Plug-In 120V DIY Mini Split?

With an outdoor condenser and an indoor wall-mounted air handler, a ductless mini split system is connected by refrigerant lines, a condensate drain and a low-voltage communication cable. 120V mini-splits do not need traditional ductwork for installation.

What makes a 120V plug-in model different is that the outdoor condenser has a factory-approved power cord kit you can plug into a standard 110–120V household receptacle, so no hardwiring is required. These systems are true heat pumps, and they can provide both air conditioning and heating. Modern cold-climate models like Zone Air's 115V units can heat down to −13°F. For 120V units, the BTU sizing usually ranges from 9,000 to 12,000 BTU.

Even with the plug-in convenience, there are still a few things you'll need to do for installation:

  • Drilling a wall pass-through for the line set
  • You'll need to mount the indoor unit and outdoor condenser
  • Routing the refrigerant lines that come precharged (with precharged DIY kits, you do not need a vacuum pump or refrigerant handling)

Common use cases include garages, bonus rooms, bedrooms, ADUs, small offices, a spot you rent and older homes where running 230V circuits is expensive or just doesn't make sense.

Understanding the 120V Plug Cord Option (What a Documented Plug-In Looks Like)

A "documented plug-in option" means the manufacturer publishes a cord kit, wiring diagram and installation instructions that explicitly show a cord-and-plug connection at the outdoor condenser. This isn't a field modification - it's engineered into the product's listing and warranty.

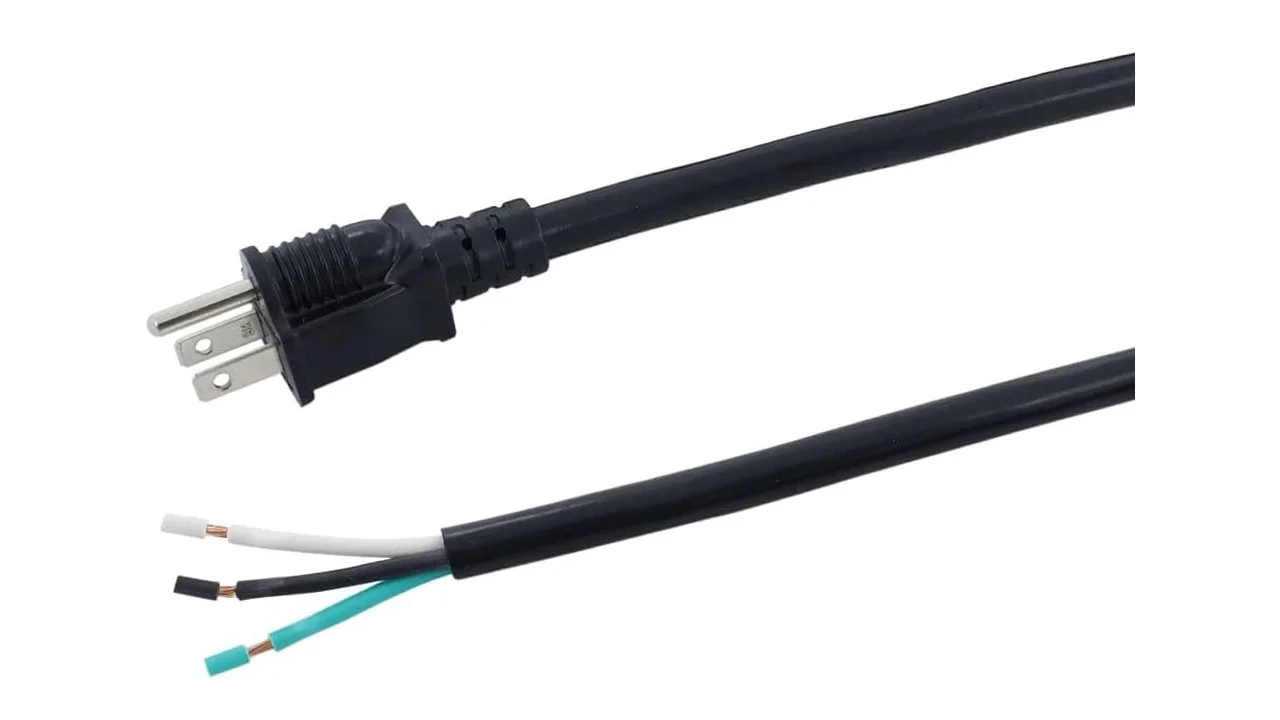
Zone Air's optional 115V power cord kit is 6 feet long and uses 12 AWG copper conductors rated 15A at 125V. It terminates in a NEMA 5-15P three-prong plug, and the other end lands on the condenser's terminal block. The indoor unit is never plugged in. Zone Air's 115V systems are hardwired by default and don't ship with a cord, so the kit is a separate purchase. The product listing calls for:

  • A dedicated 15A single-pole breaker
  • Near the outdoor unit, you need a dedicated 15A GFCI receptacle with a weatherproof in-use "bubble" cover
  • You can do a plug-in install only where local electrical and building codes allow it, and never with an extension cord

The circuit to that outlet is usually 14/2 or 12/2 NM-B cable, or UF-rated cable for outdoor or underground runs. You size it per code and run length. GFCI protection may be required by local areas for outdoor HVAC units. Weatherproof disconnect switches are often required within sight of the outdoor compressor, even when a plug is present.

By contrast, many 115V DIY systems show only a hardwire whip and disconnect in the installation manual, with no approved plug cord. Adding your own cord to a hardwire-only unit can void the warranty, break UL/ETL listing, and fail inspection.

Zone Air 120V Plug-In Mini Splits vs 115V DIY Units

Zone Air is one of the few 110–120V DIY mini split brands for 2026 that shows plug-in use with a cord kit in writing. MRCOOL, the best-known pre-charged DIY brand, sells its 115V units as hardwired only. Here is how the 12K from Zone Air loads up to the 115V DIY 5th Gen from MRCOOL:

Feature Zone Air 12K 115V MRCOOL DIY 5th Gen 12K 115V
Plug-in support Yes (optional cord kit) No - hardwired, 20A max fuse
Breaker size 15A single-pole 20A max fuse (MCA 18A)
SEER2 efficiency 23 23.5 (the 9K is 23.6)
Low-temp heating Rated to −13°F Rated to about −13°F; higher-tier 230V DIY models are rated lower
Line set 16 ft precharged in the box; custom cut to any whole foot from 5 to 75 ft Fixed 11.5, 16, 25, 35 and 50 ft sets, couplers past 50 ft, excess coiled
Price $1,999.99 (October 2026) About $2,359 at a major home-improvement retailer (September 2026)
Outdoor cooling range Up to 131°F Up to 122°F
Warranty 5-year parts, 7-year compressor, DIY install allowed 5-year parts, 7-year compressor, no registration required

Zone Air also offers a 9,000 BTU 115V model for rooms up to about 450 sq ft. Both models have inverter compressors so they run quietly and change speed as need, and neither needs changes to a 230V subpanel. On efficiency, the 115V units from MRCOOL edge past those from Zone Air by half a point. Zone Air only pulls ahead on its 230V models, at 24 SEER2.

Because the 115V units from MRCOOL are hardwired with no plug-in option, homeowners still need a hardwired circuit and, in most areas, an outdoor disconnect box.

120V Plug-In vs 230V Hardwired Systems

A 120V plug-in mini split fills a specific niche - it works for small to mid-size spaces where you want to keep things simple and save money. With a peak draw of around 10 to 15 amps, a 120V mini-split stays within the capacity of a standard household circuit. But 230V systems are still the big choice for larger applications.

Pros of 120V plug-in:

  • The electrical work is simpler when you have a 15A 120V circuit nearby that can handle it
  • There's a lower upfront cost because you don't need new 230V wiring, you don't need upgrades to the subpanel, and you don't need double-pole breakers
  • You can do a true DIY install with precharged quick-connect lines
  • This works well for garages, sheds, ADUs, bedrooms and rental upgrades

Cons of 120V plug-in:

  • You're limited to 9K–12K BTU capacity, and there are fewer multi-zone options
  • Slightly lower efficiency ceilings than top-tier 230V units (Zone Air reaches 23 SEER2 at 115V vs 24 at 230V)
  • It may fall short for large, open floor plans or spaces that don't have good insulation
  • Mini-split units that aren't sized right may not dehumidify effectively. That leads to comfort issues

When 230V still wins:

  • You can get capacities of 18K–48K BTU for projects that cover the whole home or use multiple zones
  • In extreme cold climates where the temperature stays below −13°F on a regular basis, 230V models that are rated to −22°F or lower do better
  • Hardwired systems usually connect to a 20A breaker. They can support longer line runs

Electrical Requirements, Local Codes and Safety

NEC Article 440 sets the rules for HVAC equipment wiring, and it covers cord-connected installations too. But local changes and how the inspector reads the code ultimately control what's allowed in your area.

Typical electrical requirements for a 120V plug-in mini split:

  • For plug-in units, a dedicated 15A circuit is required, with no other receptacles or loads on that breaker
  • 14 AWG or 12 AWG copper wiring, with the size based on ampacity and on how long the run is
  • 15A weather-resistant GFCI receptacle with a weatherproof cover that is rated for in-use, placed near the outdoor condenser
  • Overcurrent protection based on the MCA and MOP values on the unit's nameplate

Watch for local variations:

  • Some areas do not allow you to use a cord and plug for outdoor HVAC equipment that is permanently installed. Local codes may need mini splits to have a connection that is hardwired
  • Many need an outdoor disconnect switch even if a plug is there
  • Local electrical codes may require a licensed electrician for circuit installation

Avoid these mistakes:

  • Never use extension cords, cords that are too small, or taps that have more than one outlet
  • Never use the same circuit for the mini split and other things
  • It's a good idea to check what your local building department needs before you buy a plug-in system

Choosing the Right 120V Plug-In Mini Split Size and Line Set Length

Getting the right size affects how comfortable you are, how efficient the unit is, and how often it cycles. If a unit is too small it can't keep up, and if it is too big it short-cycles and fails to dehumidify properly. The basic rule is 18–25 BTU per square foot for spaces that are insulated and residential, though you'll want to adjust upward for poor insulation, large windows, tall ceilings or extreme climates. A sizing calculator can do the math for your room.

  • 9,000 BTU (Zone Air 115V): about 300–450 sq ft. This works for bedrooms, offices, small living rooms and basements that are finished
  • 12,000 BTU (Zone Air 115V): about 400–600 sq ft. This works for garages, ADUs, studio apartments and rooms with an open plan

Line set considerations:

  • Of the brands compared here, Zone Air is the only one (as of October 2026) that cuts your pre-charged quick-connect line set to the exact length you measure, any whole foot from 5 to 75 ft, and each length is one continuous run with no coupler
  • On fixed-length sets, the excess line gets coiled up behind the condenser. You need to follow the guidance in the manual about the minimum and maximum lengths
  • Quick-connect fittings allow for easier installation, eliminating flaring and brazing

Choose where the outdoor condenser and the indoor air handler will go at the same time, so the length of the line set helps you keep wall penetrations low and helps you stay away from kinks

DIY Installation From Brackets to Plug Cord

There is a warning: you need to follow the manufacturer's installation manual exactly. This is a high-level overview only, and if you're unsure about any step, you should hire a professional. For most homeowners, a DIY mini split installation is going to take about 4 to 8 hours from start to finish

Planning:

  • Measure the room and start laying out where the indoor unit, outdoor condenser and outlet will go
  • Make sure the outdoor spot has enough clearance for airflow, which the manual will tell you about

Indoor installation:

  • Mark the spot where the wall will be opened and drill a hole that is 2.5 to 3 inches across
  • Angle the hole slightly downward toward the outside so the condensate can drain properly and you don't end up with water damage
  • Run the line set, the drain hose and the communication cable through the wall sleeve all at the same time
  • On the bracket, the indoor air handler is hung

Outdoor installation:

  • Put the outdoor condenser on a solid pad or bracket and make sure there is clearance on all sides
  • Connect the precharged quick-connect fittings to the condenser using the torque specs that are in the manual
  • Refrigerant connections require compliance with EPA regulations for handling refrigerants

Electrical and plug cord:

  • Turn off power at the breaker panel and check that it is off with a meter
  • Install or check the dedicated 15A 120V GFCI receptacle near the outdoor unit (have a licensed electrician do this if your local area needs it)
  • You can use the wiring diagram to attach the manufacturer's optional plug cord to the condenser terminals, then plug it into the receptacle

Final steps:

  • Open service valves if that is required, check for leaks and power on
  • You can use the remote or app to set cooling or heating mode and verify correct operation for at least 20–30 minutes
  • Regular maintenance can improve energy efficiency and airflow. Clean the filters every month in the seasons when you use the unit a lot

Everyday Use, Wi-Fi, Warranty and 230V

Once installed, a 120V plug-in mini split operates like any other inverter mini split. Use the remote control or smartphone app for scheduling, mode changes and remote setpoint adjustments. Wi-Fi control is especially useful for pre-cooling a workshop or ADU before you arrive, or for landlords monitoring multiple units across properties.

Zone Air's warranty covers 5-year parts and 7-year compressor, and installing it yourself does not void it. There is no registration deadline; keep your proof of purchase and documentation of your install on file. Zone Air sells direct, with free shipping to the lower 48 and 30-day returns on uninstalled units.

When to step up to 230V:

  • With a single zone in a space that is larger than about 600 sq ft
  • In regions that are regularly below −13°F, 230V cold-climate systems that are rated to −22°F do better
  • For whole-house or multi-zone projects that need 18K–36K+ BTU

If you do move up, Zone Air's 230V 9K and 12K single-zone units are rated 24 SEER2. That is the highest of the pre-charged quick-connect DIY systems compared here (MRCOOL's best single-zone is 23.6). If you have several rooms, Zone Air is the only DIY mini split that lets you mix wall-mount, ceiling cassette and concealed ducted units on one outdoor unit (as of October 2026).

Bottom line for 2026:

  • Check local code first
  • Confirm manufacturer-documented plug cord support - spending a few minutes checking the specs now can prevent failed inspections later
  • Choose between 9K and 12K Zone Air plug-in models based on how big the room is and how well it's insulated
  • Consider 230V systems or professional installation for larger or harder applications

For most single-room projects under 600 sq ft, a Zone Air 120V plug-in mini split delivers year-round heating and cooling without the expense of new 230V wiring. Start with the spec sheets, pull your local permit if required, and plan your install with confidence.

Specs, prices and warranty terms are manufacturer-published as of October 2026, subject to change; verify before purchase. MRCOOL® is a trademark of its owner. Electrical requirements vary by jurisdiction; this article is general guidance, not electrical advice.
Sources & Methodology

Where our data comes from

Capacity, efficiency, electrical, line set and warranty figures are the manufacturers' published specifications; Zone Air prices were checked in October 2026 and the MRCOOL retail price on September 15, 2026.

Keep Reading

Related guides

The full 115V system guide, the best plug-in picks, and how to size the room first.

Size the room before you pick 9K or 12K

Run the free calculator, then compare single-zone systems that fit a 115V circuit.