
Ductless mini splits for less · 2026 buyer's guides & free sizing helpSize my system →

Best Cold Climate DIY Mini Split: Quick Answer

For most cold-climate homes the top pick is Zone Air. It's rated to –13°F, it hits 24 SEER2 on 230V, and one outdoor unit can run wall, ceiling cassette and concealed ducted indoor units together, so you can heat the whole house and not just one room. Pre-charged line sets are cut to the length you need, and installing it yourself doesn't void the warranty.

For true sub-zero winters in places like northern Minnesota or Maine, look at the Airspool HS12 Hyper-Heat DIY kit. Airspool says its EVI (enhanced vapor injection) compressor keeps it heating down to –22°F, and it ships with a pre-charged quick-connect line set. Of the brands compared here, it and MRCOOL's DIY Hyper Heat are the only pre-charged quick-connect lines rated that low (as of November 2026). The MRCOOL DIY 5th Gen is the other widely available –13°F option, and the EG4 Hybrid 12k earns a spot for anyone integrating solar panels or battery storage. All recommendations are based on current published specs (SEER2, HSPF2, low-ambient ratings) and ENERGY STAR capacity data where it exists.

Here's the ranked shortlist:

  • Zone Air - best overall, and best for heating more than one room (rated down to –13°F, 24 SEER2 on 230V).
  • Airspool HS12 Hyper-Heat - best for extreme cold (maker-rated down to –22°F, HSPF2 about 10.8).
  • The MRCOOL DIY 5th Gen in sizes from 9k to 36k is a widely available all-rounder for moderate cold, rated down to about –13°F.
  • The EG4 Hybrid 12k is the best solar-ready DIY unit for moderate cold climates, rated down to about 5°F with AC/DC input.
  • Budget picks from Chinese manufacturers - worth considering in milder cold with caveats on support.

Best DIY Mini Splits for Cold Climates

  • Zone Air (Top Pick): 9k–18k single-zone and 2- or 3-zone systems, 24 SEER2 on the 230V 9k and 12k, heats down to –13°F, R-454B. Pre-charged quick-connect line sets cut to any whole foot from 5 to 75 ft. 5-year parts and 7-year compressor coverage with no registration deadline, and installing it yourself does not void it.
  • Airspool HS12 Hyper-Heat (Best for Extreme Cold): 12,000 BTU, SEER2 21.5, HSPF2 ~10.8, Airspool rates it to heat down to –22°F with its EVI compressor. Uses R-32 refrigerant with lower global warming potential. Pre-charged line set, color-coded wiring and integrated pan heater. The best mini split for true Arctic-style DIY projects.
  • MRCOOL DIY 5th Gen (Runner-Up): 9k–36k BTU options, SEER2 23.6 (9k) and 23.5 (12k), rated to about –13°F. Pre-charged quick-connect line sets in fixed lengths. MRCOOL's Easy Pro line heats only to 5°F, and its higher-tier DIY Hyper Heat models are rated lower, to –22°F.
  • EG4 Hybrid 12k (Solar-Ready): 12,000 BTU, SEER2 ~22.5, HSPF2 ~9.7–10, direct DC solar input up to 1,100W. Operating heating range down to about 5°F. R-32 refrigerant. It's a good fit for off-grid cabins or places where utility costs are high.
  • ACiQ Extreme Heat Series: Heats down to –22°F and reaches 23 SEER2 ratings. Not a traditional DIY kit but worth noting for cold climate buyers willing to handle some professional installation steps.
  • Senville Aura Series: Maintains heating capacity at –22°F. Budget-friendly, but verify documentation quality and warranty coverage before purchasing.

All of the models listed are ductless mini split heat pump systems, not mini split air conditioner units that only do cooling. They can handle both heating and air conditioning all year round.

How We Rated Cold Climate DIY Mini Splits

Our ratings are based on data we pulled from the manufacturer spec sheets, along with published capacity figures for USDA Climate Zones 5–7. Where certified data from ENERGY STAR, NEEP or AHRI was available, it was used instead of marketing claims. Ratings like SEER2 and HSPF2 are crucial if you want to evaluate heating performance, so every unit was measured against the updated U.S. testing standards that went into effect in 2023.

Here's what we evaluated:

  • Cold climate performance under load: Can the system maintain 70°F indoors at –5°F and –13°F outdoors without excessive cycling or shutdowns?
  • Capacity retention: What percentage of rated British thermal units does the system actually deliver at 5°F and below?
  • Defrost cycle behavior: How often and for how long does the unit reverse to defrost, and how much indoor comfort is cut short?
  • DIY installation quality: Pre-charged refrigerant lines, documentation clarity, manual and video quality and tools required.
  • Warranty and support: Does the brand honor warranty coverage for DIY installation? And how easy is it to get replacement parts?
  • Energy efficiency ratings: SEER2 and HSPF2 set to current standards, with extra weight given to HSPF2 for heating-dominated climates.

Systems from Japanese and Chinese manufacturers were evaluated in the same way.

Top Pick: Zone Air (–13°F, 24 SEER2 on 230V)

Zone Air is our top pick for most cold-climate homes, and it's the clear choice if you want to heat more than one room. It's rated to –13°F, which is the same floor as MRCOOL's standard DIY 5th Gen and 18° lower than MRCOOL's Easy Pro (5°F). Higher-tier DIY models are rated lower. It's not a –22°F machine, so in Climate Zone 7/8 you'll want backup heat.

Key specs:

  • Single-zone 9k, 12k and 18k wall units, plus 2- and 3-zone systems that all run on one 27k outdoor unit
  • 24 SEER2 on the 230V 9k and 12k and on wall multi-zone. The 115V units are 23 SEER2
  • HSPF2 10.0 (Region IV) / 8.6 (Region V) on the single-zone wall units. 10.5 / 8.8 on wall multi-zone
  • Heating down to –13°F. Cooling up to 131°F outdoors
  • R-454B refrigerant
  • With the single-zone wall systems, you get pre-charged quick-connect line sets that are 16 ft long in the box.
  • 5-year parts / 7-year compressor warranty, no registration deadline, DIY install allowed
  • Final assembly, testing, and inspection in the USA from globally-sourced components

What sets it apart:

Trade-offs worth knowing:

  • –13°F is about equal to MRCOOL's standard DIY 5th Gen, not a hyper-heat rating. Below about 0°F, you can expect the output to drop off.
  • For the 230V units, the rating is 24 SEER2. The 115V units are 23 SEER2.
  • Compared to the wall units, the ceiling cassette and concealed ducted heads have lower ratings (21 and 19–22 SEER2).

Best for Extreme Cold: Airspool HS12 Hyper-Heat DIY (–22°F Claimed)

If your winters look like northern Minnesota, interior Maine or the Canadian plains, the Airspool HS12 is the one to look at if you face true extreme cold.

Using an EVI compressor is what separates the HS12 from the pack. Enhanced vapor injection technology helps maintain heating capacity in extreme cold because it sends refrigerant vapor into a middle compression stage. You get real heat output at temperatures where conventional DIY models are struggling. Most diy mini split systems rated to –13°F lose a large share of their capacity well before they reach that number, but Airspool rates the HS12 to keep working at –22°F.

Key specs:

  • 12,000 BTU cooling / ~13,500 BTU heating capacity
  • SEER2 ~21.5, HSPF2 ~10.8
  • EVI (Enhanced Vapor Injection) compressor
  • Minimum heating temperature rating: –22°F
  • R-32 refrigerant has a lower global warming potential than R 410A)
  • Pre-charged quick-connect line set (10 ft included, you can extend it to about 49 ft)
  • Integrated base pan heater so the defrost water doesn't freeze
  • Indoor noise: ~29–30 dB on low fan speed, outdoor: ~54 dB
  • Solar/DC hybrid input capability
  • 5-year coverage: a "Buy and Try" first year, then a commitment that it will work through year five

DIY installation is simple. You drill one hole in the wall, connect the wiring that is color-coded, attach the line set that is pre-charged, and mount the indoor unit on the wall. You don't need to use a vacuum pump and you don't need an EPA 608 license.

There are some realistic drawbacks to consider, though:

  • Currently only available in single zone systems - there is no multi zone option yet
  • It needs a 20-amp 120V circuit (not the standard 15-amp), so you may need to add a dedicated breaker
  • Limited in-person installer network if you get stuck mid-install
  • Line-set routing through thick walls or unusual layouts still demands patience and planning
  • Retail price is around $2,150–$2,330, which is higher than some competitors

If you're in a climate where the thermometer regularly visits –10°F or colder, this is the system that gets your money.

Runner-Up: MRCOOL DIY 5th Gen (–13°F All-Rounder)

MRCOOL's DIY 5th Gen line is the other widely available –13°F choice. If your winters are cold but not rough - think Chicago, Denver or Portland, Maine, where temps rarely stay below –10°F - it covers most rooms well.

Key specs:

  • You can get these in 9k, 12k, 18k, 24k and 36k BTU sizes. The 9k and 12k are 115V and hardwired. The larger sizes are 208/230V.
  • SEER2 23.6 (9k), 23.5 (12k), 22.5 (18k), 22.7 (24k), 18 (36k)
  • Low-ambient heat pump operation is rated to about –13°F, with full capacity to around 5°F and output dropping below that (install manual §2.7)
  • At 5°F outdoors, the 12k delivers 8,400 BTU/h according to its ENERGY STAR listing
  • Pre-charged quick-connect line sets in 11.5, 16, 25, 35 and 50 ft, with couplers for runs up to 75 ft
  • R-454B refrigerant

MRCOOL's biggest advantage is the DIY-friendly design. MRCOOL's own catalog says "no special tools or training are necessary to install", and you don't need a vacuum pump or gauges. This is a solid choice for a garage workshop, a bonus room or a supplemental zone in a home that already has central air conditioning.

Trade-offs worth knowing:

  • Cold weather output does drop below about 5°F. At –13°F, you are getting less output because the standard MRCOOL 5th Gen is not a hyper-heat system.
  • MRCOOL's DIY Hyper Heat is the line that is rated to –22°F. It comes in single-zone 12k and 18k only. It runs on 208/230V, and it has quick-connect line sets. Don't get it mixed up with the standard MRCOOL DIY 5th Gen.
  • The older 4th Gen used R-410A and is being closed out. On January 1, 2025, the manufacture and bringing in of new R-410A residential systems ended, though units that were built before then can still be installed. R-410A parts and refrigerant will become harder and more expensive to find over time.
  • With the MRCOOL DIY 5th Gen, you get a 5-year parts and 7-year compressor warranty and no registration is required. It does not cover faulty installation, so you need to follow the instructions exactly. MRCOOL's DIY Select line is covered for only 1 year on parts and 2 years on the compressor.
  • Price: the 12k 115V unit was running about $2,359 at Home Depot in September 2026.

Solar-Ready Choice: EG4 Hybrid 12k DIY (Off-Grid Friendly)

With plans to add solar or battery integration, the EG4 Hybrid 12k is the best diy mini split for cold climate users. Its main feature is a direct input for DC solar PV (90–380 VDC, up to ~1,100W) that works alongside standard AC grid power. The system automatically switches between the two sources. That makes it a good choice for off-grid cabins, shops and homes where energy bills are a primary concern.

Key specs:

  • 12,000 BTU nominal (3,000–12,500 BTU variable range), with about 13,000 BTU for heating
  • SEER2 ~22.5, HSPF2 ~9.7–10
  • R-32 refrigerant
  • Pre-vacuumed 16.4-ft quick-connect line set
  • Operating heating range: it works down to about 5°F outdoors
  • Wi-Fi control included
  • 5-year limited warranty

In moderate climates, like the interior of the Pacific Northwest, the hills of the mid-Atlantic, and high-elevation areas with cold winters that are not far north, the EG4 offers a good balance of energy efficiency, DIY capability and energy freedom.

Who this is for:

  • You are a solar-minded DIYer in a cold climate that is not extreme
  • You own a cabin or second home and you want freeze protection without having to rely on the grid
  • You want to save energy by running the heat pump directly off solar panels on days when it is sunny in the winter

Who should look elsewhere:

  • If you regularly see temps below 0°F, the EG4's ~5°F floor means you need a different primary system. This unit's cold climate performance is good for fall and spring seasons and moderate winters, but readers in true arctic-style climates should prefer a –22°F-rated system.
  • Diy installation is more complex on the electrical/solar side. EG4's manual calls for licensed electrical work, even though the refrigerant line circuit is DIY-friendly. Local code may require permits for the DC solar input.

Best Budget Cold-Capable Systems from Chinese Manufacturers

Several large foreign manufacturers sell budget ductless mini splits with solid cold climate specs, some sold as DIY-ready kits. These can be genuinely good value, but the buying experience is different from premium DIY vendors.

Typical specs for current budget models:

  • SEER2 18–20, HSPF2 9–11
  • Low-ambient heating is to around –5°F to –13°F
  • Many now use R-32 refrigerant so they run more efficiently and have a lower global warming potential
  • Prices often run $800–$1,500 for hardware, a lot cheaper than the premium DIY kits

Other brand sources have cold-capable models, including the Friedrich Floating Air series that operates effectively at –13°F. The Senville Aura series that maintains heating capacity at –22°F. ACiQ's Extreme Heat series also heats down to –22°F and reaches 23 SEER2 ratings, though it usually needs more steps that a professional has to do.

Buyer-beware conditions:

  • Documentation and after-sales support can be worse when you compare them to premium DIY vendors. English-language manuals vary in quality.
  • Warranty claims may be slower, and finding replacement parts in the U.S. can be something that's a challenge.
  • Many "DIY" listings from these manufacturers still expect a professional to handle the final electrical steps and the refrigerant steps, which is not the same as the fully pre-charged kits from Zone Air, MRCOOL or Airspool.
  • Goodman mini splits are reliable only in mild climates. Don't expect them to perform in temperatures below zero.
  • Always check whether you can get parts, whether you can get tech support, and whether the unit gets rebates before buying.
  • If the price looks too good to be true, check the warranty terms and the low-ambient rating before you order. A cheap unit that locks out at 15°F is no deal in January.

Cold Climate Performance: What Matters Below Freezing

Cold climate performance means one thing in practical terms: can your heat pump maintain 68–72°F indoors when it's brutally cold outside, without burning through electricity or shutting down? The cold climate rating on a spec sheet is a starting point, not the full story.

Here's what actually matters:

  • Low-ambient rating: This is the lowest outdoor temperature where the unit still runs. But "runs" and "heats effectively" aren't the same thing. A unit rated to –13°F might only deliver 50% of its listed heating capacity at that temperature. Looking at the ratings for minimum heating temperature for heat pumps shows that it'll keep running in freezing conditions, though you need to look deeper to see what you're actually getting.
  • Capacity retention: This is the critical number to look at. At 5°F, ENERGY STAR lists 8,400 BTU/h for MRCOOL's DIY 5th Gen 12k and 11,000 for its 12k Hyper Heat. The Airspool HS12 claims output all the way to –22°F thanks to EVI. Mitsubishi's best Hyper-Heat wall units hold full rated capacity down to about –10°F, which is great. Daikin's Aurora series has a rating that says it can operate down to –13°F.
  • Defrost cycle logic: Every heat pump has to reverse its cycle now and then to melt frost off the outdoor coils. Smarter units defrost only when they actually need it (demand defrost) rather than on a timer. That saves energy while keeping indoor temperatures more steady.
  • Base pan heater: A base pan heater keeps defrost water from freezing in cold-climate heat pumps. Without one, melted water freezes again and can damage the outdoor unit or block airflow. Any system that's sold for cold climates should have this.
  • EVI compressors: Enhanced vapor injection technology helps maintain heating capacity in extreme cold by raising refrigerant pressure at middle stages. DIY mini splits need low-ambient heating capacity to do well in cold environments, and EVI is the main technology that delivers it.

Always cross-check the manufacturer's technology data - not just what the brochure claims - especially around –13°F and –22°F ratings. AHRI, NEEP and ENERGY STAR listings are the gold standard.

Energy Efficiency in Cold Climates

Heating Seasonal Performance Factor 2 (HSPF2) is the number that matters most for buyers in cold climates. It shows how efficiently your heat pump turns electricity into heat across an entire heating season. An HSPF2 rating above 9.0 shows strong heating performance. With a higher number, you pay less for each unit of warmth. If a spec sheet lists a Region V figure, that is the one rated for northern climates, and it will be lower than the main Region IV number.

SEER2 measures cooling efficiency and matters for humid summers, but in a climate where you are heating seven months a year, HSPF2 is what drives your energy bills.

Here's a practical comparison:

MetricHSPF2 11 UnitHSPF2 8.5 Unit
Estimated kWh/season (600 sq ft, Zone 6)~2,700 kWh~3,500 kWh
Cost at $0.15/kWh~$405~$525
Annual savings-~$120 more

Over a 15-year system life, that efficiency gap can add up to $1,800 or more - enough to help make it worth paying extra upfront for a higher-rated unit.

Key points for energy consumption:

  • Mini-splits can use 60% less energy than electric resistance heat, so they cost a lot less to run than baseboard heaters or space heaters.
  • Inverter-driven ductless mini splits change the speed of the compressor to match the load, and that gets rid of the on/off cycling that uses up extra energy in older systems.
  • In cold climates, a high HSPF2 is more valuable than a high SEER2. Pick what matters most.
  • Fujitsu's top Orion XLTH+ wall units reach up to 33.5 SEER2 and they're rated to –22°F, which is impressive, but it comes with professional installation. Fujitsu systems are worth noting for buyers in climates with both harsh winters and humid summers.

DIY Mini Split vs Central Air and Heat Pumps

If you already have central air conditioning or a furnace, you might wonder whether ductless mini splits are worth adding. Here's how they stack up for homes in cold climates.

How ductless systems beat central air:

  • Mini splits have no energy loss through ductwork. Duct losses in older homes can waste 25–40% of heating energy before it reaches the room.
  • Mini splits provide individual room temperature control. Each indoor unit operates independently, so you're not heating empty rooms.
  • Mini splits can dehumidify air continuously during operation, which improves comfort without a separate dehumidifier.
  • Mini splits are easier to install than traditional HVAC systems, especially as a retrofit. You don't have to tear open walls for ductwork.
  • In a garage workshop, basement or bonus room that doesn't already have ducts, a diy mini split is often the only practical choice besides a space heater.

Limitations to keep in mind:

  • A single indoor head cannot really replace a whole-house central system in a large, multi-story home. You'd need multiple indoor units, which means a multi zone system, and that adds cost and complexity.
  • Professionally installed multi zone mini split systems cost between $6,500 and $15,000, and each extra indoor head adds $1,500 to $4,000 to what you pay to have it installed. A DIY multi-zone kit costs a lot less: Zone Air's 2-zone wall system is $3,239.99 before line sets (November 2026).
  • Central ac with a good ducted heat pump may still be the better choice for open floor plans that already have ductwork in good condition.
  • In many cold climate homes, the best approach is to keep your existing furnace or central air as backup and add a DIY mini split as a cold-climate booster for the rooms where you spend the most time.

Choosing the Right Size DIY Mini Split for Cold Climates

Proper sizing is critical in cold climates because a unit that is too small can't maintain set temperature when it's –5°F outside. A unit that is too big short-cycles during the in-between seasons, handles humidity poorly in humid summers, and wears out faster.

Proper sizing of mini splits should account for insulation and specific winter temperature conditions, not just square footage.

Step-by-step sizing guidance:

  1. Measure your space: Determine the square footage of the room or zone you're heating. A 12,000 BTU unit usually covers 300–550 sq ft in a space that has good insulation.
  2. Account for insulation quality: Poorly insulated garages, older homes or rooms with large windows need 20–30% more capacity. A 12k BTU unit might only handle 250 sq ft in a garage workshop that has drafts.
  3. Adjust for your climate zone: In Zone 7 (design temp –10°F to –20°F), size mini split capacity based on the coldest expected temperature, not the average winter day. This is where many DIYers undersize.
  4. Use a load calculation: Manual J calculations account for insulation R-value, window area, air leakage, orientation and occupancy. Even DIYers should run a basic version - a free tool like Zone Air's mini split sizing calculator works - rather than guessing based on room size alone.
  5. Inverter compressors help: Because inverter-driven units modulate output from ~30% to 100%, slight oversizing is less problematic than with fixed-speed units. In cold climate applications, erring slightly high on BTU size is usually the safer bet.

Using a secondary heat source is recommended during extreme cold when heat pumps may struggle, even with a properly sized system. A small electric baseboard or wood stove as backup provides peace of mind on the coldest nights.

Installation Reality: What "DIY Mini Split" Really Means

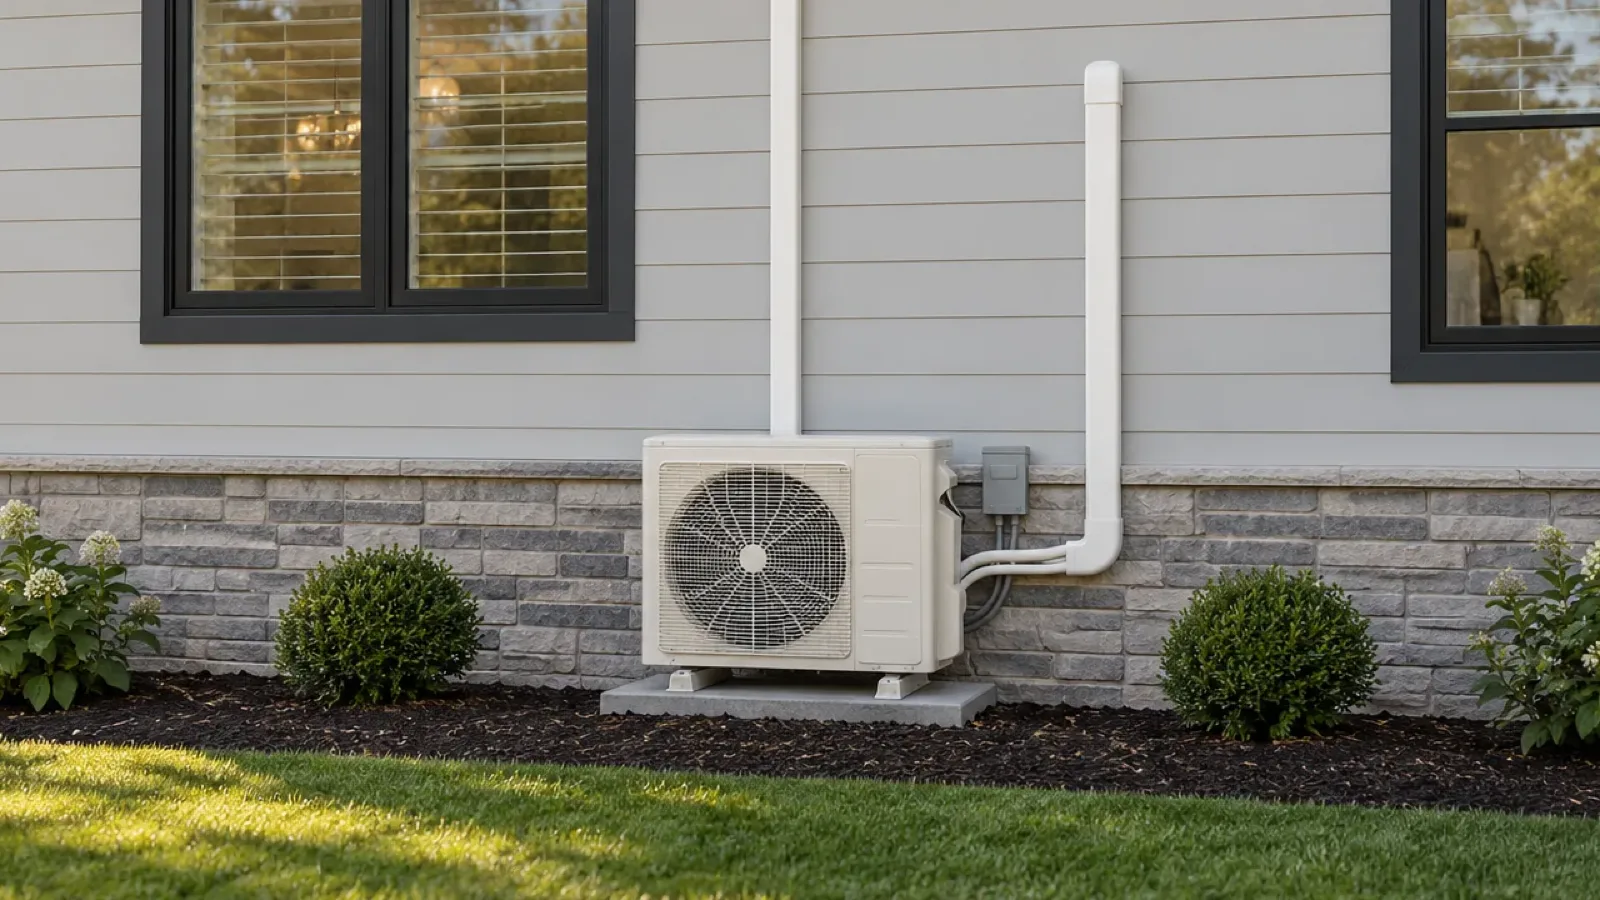
The term "diy mini split" means the refrigerant circuit comes pre-charged and uses quick-connect fittings, so you don't need EPA 608 certification or a vacuum pump. Pre-charged quick-connect line sets allow for DIY installation without refrigerant handling. But that doesn't mean the whole project is plug-and-play.

Here's what you'll actually do:

  1. Mount the indoor unit: Secure a mounting plate to the wall, and hang the indoor head on it. You need a drill, a level and studs or the right wall fasteners. Skill level: moderate.
  2. Install the outdoor unit: Place it on a concrete pad, a stand at ground level, or a wall bracket. Must be level. Skill level: moderate.
  3. Drill through the wall: You'll need a 3-inch core hole for the refrigerant line, the drain and the wiring. Skill level: moderate to challenging (especially if you're going through brick, stone or thick insulation).
  4. Run the line set: Route the pre-charged line through the wall and connect it to both units. Follow the torque specs exactly on the quick-connect fittings. Skill level: moderate.
  5. Connect condensate drain: Route the drain line to a proper outlet so it won't freeze again in winter. Skill level: easy.
  6. Electrical connections: This is where many diy models get complicated. Installation typically requires a licensed installer for the breaker, disconnect and final wiring in many jurisdictions. Even if the unit comes with a standard plug, local code may require a dedicated circuit and outdoor disconnect switch.

Homeowners should be cautious of warranty requirements especially when it comes to who is allowed to do the installation. Some warranties - even on DIY-branded units - can be voided by improper installation or failure to register the equipment. Always document your work with photos.

Cold Weather Installation Tips for DIYers

  • Install the outdoor unit on a raised wall bracket or stand at least 12–18 inches above expected snow line to prevent snow blockage and ice buildup. Installation of outdoor units should consider elevation to avoid snow accumulation issues.
  • Route the condensate drain and defrost water where it cannot refreeze across walkways or drip onto neighboring property. Use heat tape on drain lines in extreme cold climates.
  • Add wind baffles or a fence section on the prevailing wind side to protect the outdoor compressor from drifting snow, while maintaining manufacturer-specified airflow clearances (usually 12–24 inches on all sides).
  • Insulate and UV-protect the entire run of the refrigerant line set from where it goes through the wall to the outdoor unit. In cold climates, lines that are not insulated lose efficiency and they develop condensation that can freeze and degrade the fittings.
  • Seal the wall penetration thoroughly with fire-rated sealant or putty to prevent air infiltration and moisture intrusion. This is a critical step that many DIYers rush.
  • If you're installing in fall for the upcoming winter, run the system in cooling mode briefly to verify that it works before cold weather arrives. Troubleshooting is a lot easier at 50°F than it is at –10°F.

Defrost Cycles, Noise and Cold Weather Comfort

Every heat pump that runs in cold weather must periodically reverse its refrigerant cycle to melt frost from the outdoor coils. During defrost, the indoor unit temporarily stops blowing warm air (or blows cool air briefly), and the outdoor unit may release visible steam. This is normal, but poorly designed defrost logic can create noticeable comfort changes.

Better cold climate models, like the Airspool HS12 and Mitsubishi units, use demand-based defrost rather than clock-based defrost. Demand defrost monitors actual frost buildup and only fires when necessary, reducing wasted energy and indoor temperature dips.

Here's what you can look for in specs and user feedback:

  • Defrost cycle duration: a duration under 5 minutes is good, but a duration over 10 minutes is excessive.
  • How often it runs at different outdoor temperatures: once per hour at 20°F is typical, and more often than that suggests a design flaw.
  • Indoor noise: modern ductless mini splits operate at 23–30 dB on low fan speed, which is about as quiet as a soft whisper. The outdoor parts handle the big work, so mini splits run quietly inside.
  • Outdoor noise: expect 48–58 dB during normal operation, potentially loud during defrost. You can place the outdoor unit away from bedroom windows.
  • Expansion and contraction clicks: plastic cases click as they warm and cool. This is cosmetic, and it's not mechanical failure.

Smart Controls and Remote Monitoring in Cold Climates

Smart features matter more in cold climates than most people realize. If you own a cabin, rental property or second home in a cold region, Wi-Fi control lets you:

  • Set a minimum temperature from a distance to prevent freeze damage to pipes
  • You can pre-heat the space before you get there, rather than walking into a 35°F cabin
  • You can monitor energy consumption and system status from your phone
  • Receive alerts if the system goes down during a cold snap

Practical considerations:

  • Most current diy mini split systems include Wi-Fi app control, but integration with Alexa, Google Home or Home Assistant may need a third-party IR controller.
  • In heavily insulated or metal-clad buildings (like a garage workshop), Wi-Fi signal can be weak. Place the router or a range extender within line of sight of the indoor unit.
  • IR-based smart remotes don't have much range - in practice you get about 15 to 20 feet - and some apps have reliability issues. Stick to brands that support their products well and put out regular software updates.
  • If reliable remote monitoring is critical (empty property in a cold zone), consider a system with built-in Wi-Fi rather than relying on an add-on controller.

Reliability, Warranty and Support for DIY Installers

Cold climates are harder on mini split systems.

With wide temperature changes, frequent defrost cycles and 6–8 month heating seasons, the stress speeds up wear, so reliability and warranty coverage become more important than they are in moderate climates.

Mitsubishi and Daikin have strong reliability records that come from decades of field data. Mitsubishi's best Hyper-Heat wall units hold full capacity to about –10°F, and Mitsubishi offers 12 years of coverage when a Diamond Contractor installs and registers the system. However, these are not DIY-install systems. They require professional installation, which means higher installation costs.

There is a lot to look at for true diy models:

  • Airspool HS12: 5-year coverage (Buy and Try in year one, then a functionality commitment), supports DIY installation in plain terms
  • Zone Air: 5-year parts / 7-year compressor, no registration deadline, and installing it yourself does not void it
  • MRCOOL DIY 5th Gen: 5-year parts / 7-year compressor with no registration required. Follow the install procedure, since faulty installation is excluded
  • EG4 Hybrid: 5-year limited warranty, but the manual calls for licensed electrical work

Questions to ask sellers before buying:

  • Does the warranty clearly cover DIY installation, or does it need a licensed professional?
  • Is product registration required within a specific amount of time?
  • Where do replacement parts come from, and what's the typical time to get them?
  • Can you call or chat with someone if you get stuck installing it yourself?

Differences between established Japanese brands (Mitsubishi units, Fujitsu systems) and budget manufacturers are real. Japanese brands have deeper service networks and faster parts availability. Budget brands may offer competitive hardware but slower support. Neither should be dropped just like that - but go in with clear expectations.

Regional Recommendations by Climate

  • Climate Zone 7/8 (Northern New England, Upper Midwest, Interior Alaska): Design temps –15°F to –30°F. Use –22°F-rated systems like the Airspool HS12, MRCOOL DIY Hyper Heat or ACiQ Extreme Heat. Target HSPF2 ≥ 10.5. Backup heat is strongly recommended even with hyper-heat units. Example cities: Duluth, MN; Caribou, ME; Fairbanks, AK.
  • Climate Zone 6 (Southern New England, Great Lakes, Northern Rockies): The design temps run –5°F to –15°F. Zone Air, the MRCOOL DIY 5th Gen, or the Airspool HS12 all work here, though you'll want backup heat for the coldest nights if you're running a unit that is rated to –13°F. Target HSPF2 ≥ 9.5. Example cities include Burlington, VT, Minneapolis (metro), MN, and Bozeman, MT.
  • Climate Zone 5 (Mid-Atlantic, Central Rockies, Pacific Northwest Interior): The design temperatures in this zone are 5°F to –5°F. Zone Air, the MRCOOL DIY 5th Gen, the EG4 Hybrid or budget units that can handle cold weather can all do the job. Target HSPF2 ≥ 9.0. Example cities: Denver, CO; Pittsburgh, PA; Spokane, WA.
  • Climate Zone 4 and more mild (Southern California, coastal PNW, Southeast): The design temperatures in this zone stay above 15°F. Pretty much any mini split that is energy efficient works here, even ones that are only rated to 5°F. Solar-hybrid units like the EG4 do well in southern California or anywhere that utilities cost a lot. Budget options from Chinese manufacturers are fine too.
  • Everywhere: Consider backup or supplemental heat in the very coldest regions. A properly sized hyper-heat mini split can carry most of the heating load, but building code or common sense often calls for some backup source.

Cost Breakdown: Equipment, Installation and Operating Costs

Here is what the equipment for a DIY mini split costs as of November 2026:

ItemTypical Cost
Airspool HS12 Hyper-Heat kit$2,150–$2,330
Zone Air 12k 115V / 230V$1,999.99 / $2,199.99
Zone Air 2-zone wall system$3,239.99 plus line sets
MRCOOL DIY 5th Gen 12k 115V~$2,359 (Home Depot, September 2026)
EG4 Hybrid 12k (with solar hardware)$1,800–$2,500+
Budget Chinese 12k kits$800–$1,400

Even at the budget end, DIY mini split systems are at least $1,000 for the hardware alone. On top of that there are installation costs.

  • Electrician for dedicated breaker and disconnect: $200–$800 depending on panel distance and permits
  • Concrete pad or wall bracket: $50–$150
  • Miscellaneous supplies like sealant, insulation tape and drill bits: $50–$100
  • Your time: 4–10 hours if it's your first install

Total DIY project cost: usually $1,400–$3,200 per zone, depending on the system you pick.

By comparison, having a single-zone mini split fully professionally installed costs from $2,400 to $6,000. When you look at those ranges, DIY can save you about $800–$2,000 per zone if you're confident you can follow the instructions carefully.

Ongoing operating costs: a 12k BTU unit with HSPF2 of 10.8 heating a 500 sq ft zone through a 5-month winter in Zone 6 uses roughly 2,500–3,000 kWh, costing $375–$450 at average U.S. electricity rates. That's dramatically less than resistance electric heat would cost for the same space.

Tax Credits, Rebates and Incentives

Under Section 25C, the federal Energy Efficient Home Improvement Credit used to pay 30% of a qualifying heat pump, with a top limit of $2,000, but it ended for equipment placed in service after December 31, 2025. If you're putting a system in now, you'll want to look at state and utility programs instead.

Important caveats:

  • The rules for who can get a rebate and how much you can get change a lot. It's a good idea to check the current details with your utility and the DSIRE list instead of relying on outdated blog posts.
  • Many state and utility programs in cold climate regions offer rebates for cold climate heat pumps, and they often need a minimum HSPF2, low-ambient ratings that are written down, or a specific certification listing. For example, Minnesota Power has offered rebates of $1,000 for ductless cold climate systems.
  • Some programs may require professional installation and may not recognize purely DIY projects for rebates. This is an important check before choosing a DIY route - you might save on labor but lose a larger rebate. Zone Air's rebate lookup is a quick place to start.

Common DIY Pitfalls in Cold Climate Mini Split Projects

  • Sizing too small for real winter temperatures: Sizing based on the "average January" temperature instead of the design day temperature. When the cold snap arrives, your too-small unit can't keep up.
  • Poor outdoor unit placement: Positioning under roof eaves where ice and snow dump directly onto the unit, or in low spots where blowing snow covers it up.
  • Inadequate line-set insulation: Leaving the copper exposed or using thin foam wrap on the exterior runs. In cold weather, this costs you efficiency and leads to condensation and ice buildup.
  • Skipping the torque wrench on line-set fittings: Hand-tightening or over-tightening both cause refrigerant leaks. Follow manufacturer torque specs exactly.
  • Undersized wire or wrong breaker: Using 14-gauge wire on a 20-amp circuit, or a 15-amp breaker where 20 is specified. This is a fire hazard and a code violation.
  • No outdoor disconnect: Many areas need a visible disconnect within sight of the outdoor unit. Skipping this fails inspection and may void insurance.
  • Not pulling permits: Electrical permits are required in most areas. Skipping them can create problems with home insurance and resale.
  • Missing a registration deadline: Some brands need you to register within days or weeks of putting the unit in to get the full warranty, and if you miss that window the term can drop to a year. Zone Air and the MRCOOL DIY 5th Gen need no registration for coverage, but check whichever brand you buy.

When in doubt, bring in a pro for the parts of the job you're not comfortable with. Paying an electrician $400 costs less than replacing a compressor you voided the warranty on.

Planning Your Cold Climate DIY Mini Split Project Next Steps

  1. Check what your USDA climate zone is and what your local design temperature is. This single number is what drives every other decision.
  2. Choose a unit rated for at least –13°F in your zone, or –22°F if you're in Zone 7/8. Don't settle for a cooling system that is sold as a heat pump but stops working at 20°F.
  3. Run a sizing calculation based on your room's square footage, insulation level, window area and air leakage - not just floor area.
  4. Verify that your electrical panel has the capacity for a dedicated circuit at the required amperage. Schedule an electrician if required.
  5. You'll want to order your system and all supplies before cold weather arrives. Installing in fall will give you time to troubleshoot before you have to depend on the unit.
  6. Take photos and make notes about every installation step. This will protect your warranty coverage and will help any future HVAC specialist who services the unit.
  7. Check whether your brand needs registration and by when. Go ahead and register so you have proof of purchase on file.
  8. Set up a maintenance routine: clean the filters every 2–4 weeks when you're using the unit a lot, keep snow and ice cleared away from the outdoor unit, and check the line-set insulation once a year.
  9. Keep the spec sheet and manual for your unit handy. Zone Air publishes a one-page spec sheet, the full manual and an install guide for every unit.
FAQ

Frequently Asked Questions About Cold Climate DIY Mini Splits

Yes, but it depends on the unit. A system rated to –22°F should still give useful heat at –10°F. Airspool, for one, says its EVI-equipped HS12 keeps producing useful heat at that temperature. A unit rated to –13°F, like Zone Air or the standard MRCOOL DIY 5th Gen, will still run but with reduced capacity. Mitsubishi's best Hyper-Heat wall units hold full capacity to about –10°F, which is exceptional, but those systems require professional installation.
In many cold climate homes, a properly sized hyper-heat mini split can carry most of the heating load. But building code or simple prudence often calls for some backup source - especially in Zone 7/8 climates. Mini splits start to lose capacity as temperatures drop, and a furnace or wood stove provides insurance against the coldest nights.
In moderate climates (Zone 5), probably not if you size correctly. In extreme cold (Zone 7/8), yes. Even a small electric baseboard in the same room provides a safety net. Using a secondary heat source is recommended during extreme cold when heat pumps may struggle.
Indoors, modern ductless mini splits run at 23–30 dB on low speed - quieter than a refrigerator. The outdoor unit is louder (48–58 dB) and may produce noticeable sounds during defrost cycles. Place the outdoor unit away from bedroom windows. Mini splits operate quietly with the outdoor compressor handling most of the noise.
No. Mixing brands is never supported, even if the units are in the same class. It will void your warranties. Always use indoor and outdoor components that match, and make sure they are from the same manufacturer and product line.
Not by itself. A clean, code-compliant DIY installation with proper permits and documentation is considered the same as a professional one by most home inspectors. Poor workmanship, missing permits or visible code violations will hurt the resale value of your home, no matter who did the work.
R-32 or R-454B. Both have a lower global warming potential than R-410A. Since January 1, 2025, new residential systems made or brought into the U.S. must use these lower-GWP alternatives, though older R-410A stock can still be installed. Zone Air and MRCOOL's current DIY lines use R-454B.
Daikin's Aurora series is rated to –13°F and Mitsubishi units are industry leaders in cold climate performance, but neither one offers a true DIY-install product line with pre-charged quick-connect lines. They need professional installation, which adds to installation costs but ensures proper setup and full warranty coverage.
Specs and warranty terms are manufacturer-published as of November 2026, subject to change; verify before purchase. MRCOOL® is a trademark of its owner.
Sources & Methodology

Where our data comes from

Zone Air and MRCOOL capacity, efficiency, cold-climate, line set and warranty figures are the manufacturers' published specifications, checked in November 2026. Figures for Airspool, EG4 and other brands are as published by those brands; verify them on the manufacturer's spec sheet before buying.

Keep Reading

Related guides

More on heating through a cold winter, sizing for heat and DIY installs.

Size for your coldest night first

Run the free calculator for your space, then compare single-zone systems side by side.